Stwórz ranking łowcy potworów.

Mo.co Tier List Maker

Uszereguj 47 broni, gadżetów i pasywek Mo.co na przeszukiwanej planszy. Zacznij od redakcyjnego snapshotu z września 2026 i pobierz PNG.

BezpłatneBez rejestracji47 przedmiotówEksport PNG
Zapisano lokalnie w tej przeglądarce
03 Zapisz i udostępnij
02Przeciągnij, aby ocenićEDYTOR NA ŻYWO
0 elementów sklasyfikowanych
Upuść tu najlepszy
Upuść tu obrazy
Upuść tu obrazy
Upuść tu obrazy
Upuść tu obrazy
Redakcyjny snapshot mety · wrzesień 2026

Mo.co Tier List (wrzesień 2026)

Użyj aktualnego snapshotu społeczności jako punktu wyjścia, a potem podejmij własną decyzję w edytorze. Każda karta zawiera rolę i krótki powód, dzięki czemu ranking można wyjaśnić.

wrz. 2026snapshot
47przedmioty ekwipunku
3systemy rankingu
S–Dedytowalne poziomy

Tier lista broni Mo.co

Broń oceniona według profilu obrażeń, przetrwania, kontroli i użyteczności solo, w grupie oraz przeciw bossom.

S

Poziom S

3 przedmiotów
Mo.co Jaded Blades
Jaded Blades
Rola · Melee · single target

Dlaczego tutaj: High-speed stabs plus a charged dash that deals massive damage and stuns non-boss monsters.

Mo.co Speedshot
Speedshot
Rola · Ranged · single target

Dlaczego tutaj: Long-range boss pressure ramps after 10 attacks through SPEED mode.

Mo.co Spinsickle
Spinsickle
Rola · Melee · area damage

Dlaczego tutaj: SPIN mode adds faster attacks, enemy pass-through, area damage, and a chance to avoid hits.

A

Poziom A

3 przedmiotów
Mo.co Wolf Stick
Wolf Stick
Rola · Ranged · pet

Dlaczego tutaj: The summoned wolf adds area damage, a taunt, and a body-slam stun while you attack from range.

Mo.co Techno Fists
Techno Fists
Rola · Ranged · bounce

Dlaczego tutaj: Bouncing energy balls give reliable cleave and stun value, with a stronger mega-ball combo.

Mo.co Buzzkill
Buzzkill
Rola · Melee · pet

Dlaczego tutaj: Front-facing area damage combines with up to three bees that add long-range pressure.

B

Poziom B

4 przedmiotów
Mo.co Portable Portal
Portable Portal
Rola · Ranged · gadget synergy

Dlaczego tutaj: Its free rightmost-gadget activation can be strong, but the result depends on gadget cooldown and build.
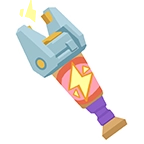
Mo.co Monster Slugger
Monster Slugger
Rola · Melee · area damage

Dlaczego tutaj: Reliable area swings and a slowing big hit are useful, but its single-target ceiling is more limited.

Mo.co Poison Bow
Poison Bow
Rola · Ranged · poison

Dlaczego tutaj: Poison volleys add damage over time and slow groups; spreading poison is more valuable than pure boss focus.

Mo.co Toothpick & Shield
Toothpick & Shield
Rola · Tank · damage reduction

Dlaczego tutaj: Twenty-five percent damage reduction and a retaliate slam make it dependable for defensive play, not raw damage.

C

Poziom C

3 przedmiotów
Mo.co Singularity
Singularity
Rola · Melee · cooldown utility

Dlaczego tutaj: Area attacks and gadget cooldown reduction bring utility, but the kit is more tempo-dependent than top picks.

Mo.co CPU Bomb
CPU Bomb
Rola · Ranged · area damage

Dlaczego tutaj: Long-range area damage and a delayed stun bomb are useful, but the combo is slower to land.

Mo.co Hornbow
Hornbow
Rola · Ranged · multi-shot

Dlaczego tutaj: Three bolts and a piercing mega-shot reward tight positioning, which makes its output less forgiving.

D

Poziom D

2 przedmiotów
Mo.co Staff of Good Vibes
Staff of Good Vibes
Rola · Support · healing

Dlaczego tutaj: It heals allies while damaging at range, but the dedicated support role is niche when teams prioritize damage.

Mo.co Medicine Ball
Medicine Ball
Rola · Support · healing

Dlaczego tutaj: Close-range area damage and every-third-attack healing are useful in a coordinated group, but situational overall.

Tier lista gadżetów Mo.co

Gadżety ocenione według obrażeń, leczenia, kontroli, wartości odnowienia i łatwości łączenia z różnymi broniami.

S

Poziom S

2 przedmiotów
Mo.co Smart Fireworks
Smart Fireworks
Rola · Ranged · area damage

Dlaczego tutaj: Five homing projectiles deliver reliable long-range area damage against groups.

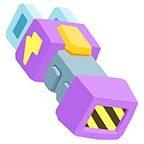
Mo.co Multi Zapper
Multi Zapper
Rola · Lightning · stun

Dlaczego tutaj: Twelve zaps can focus a strong enemy and stun non-bosses, giving it broad encounter value.

A

Poziom A

5 przedmiotów
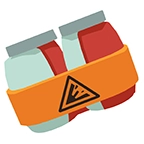
Mo.co Explosive 6-Pack
Explosive 6-Pack
Rola · Mobility · area damage

Dlaczego tutaj: Jumping bombs add area damage while helping you clear low obstacles or avoid incoming hits.

Mo.co Snow Globe
Snow Globe
Rola · Area damage · zone

Dlaczego tutaj: Its sustained area zone is built for keeping damage on grouped enemies.

Mo.co Vitamin Shot
Vitamin Shot
Rola · Buff · healing

Dlaczego tutaj: Attack-speed and healing support both damage output and survivability for you and your pets.

Mo.co Boombox
Boombox
Rola · Area damage · stun

Dlaczego tutaj: A 360-degree wave damages and stuns non-bosses, covering weapons that lack crowd control.

Mo.co P.E.W 3000
P.E.W 3000
Rola · Turret · single target

Dlaczego tutaj: The long-range turret adds sustained single-target damage, although its cooldown is long.

B

Poziom B

5 przedmiotów
Mo.co Monster Taser
Monster Taser
Rola · Stun · single target

Dlaczego tutaj: A short cooldown and strong single-target stun are valuable, but it has no area damage and is weaker against bosses.

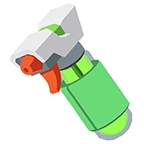
Mo.co Pepper Spray
Pepper Spray
Rola · Cone · slow

Dlaczego tutaj: Repeated cone damage and a slow control groups at range, while its single-target value is limited.

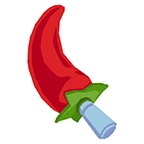
Mo.co Spicy Dagger
Spicy Dagger
Rola · Dash · debuff

Dlaczego tutaj: The dash slows non-bosses and temporarily makes the target take more damage from the whole build.

Mo.co Really Cool Sticker
Really Cool Sticker
Rola · Buff · weapon and pets

Dlaczego tutaj: The short damage window is strong when a weapon or pet build can concentrate attacks.

Mo.co Very Mean Pendant
Very Mean Pendant
Rola · Area damage · sustain

Dlaczego tutaj: It deals damage over time and heals you, with its best value when one enemy takes the full damage.

C

Poziom C

4 przedmiotów
Mo.co Revitalizing Mist
Revitalizing Mist
Rola · Healing · support

Dlaczego tutaj: Instantly healing the lowest-health nearby ally is useful sustain, but it contributes no direct damage.

Mo.co Life Jacket
Life Jacket
Rola · Shield · area damage

Dlaczego tutaj: The shield protects you and pets before exploding for area damage and a non-boss stun; timing matters.

Mo.co Feel-Better Bloom
Feel-Better Bloom
Rola · Healing · area

Dlaczego tutaj: A healing totem can sustain allies in its radius, but its longer cooldown limits repeated uptime.

Mo.co Shelldon
Shelldon
Rola · Summon · taunt

Dlaczego tutaj: The armored summon adds close-range area damage and aggro control, balanced by a long cooldown.

D

Poziom D

2 przedmiotów
Mo.co Splash Heal
Splash Heal
Rola · Healing · team

Dlaczego tutaj: Pure healing has no monster damage, so its value is highly dependent on team play.

Mo.co Super Loud Whistle
Super Loud Whistle
Rola · Tank · aggro

Dlaczego tutaj: Aggro utility is a narrow fit for defensive tank builds and offers less value to general damage setups.

Tier lista pasywek Mo.co

Pasywki ocenione według stałości, synergii buildu, przetrwania i wartości dodawanej w zwykłej walce.

S

Poziom S

2 przedmiotów
Mo.co Vampire Teeth
Vampire Teeth
Rola · Sustain · weapon and pets

Dlaczego tutaj: Weapon attacks heal you and pet attacks heal them, rewarding continuous pressure with reliable sustain.

Mo.co Unstable Lazer
Unstable Lazer
Rola · Proc · area damage

Dlaczego tutaj: Its weapon-or-pet damage proc scales naturally with area attacks and pet-heavy builds.

A

Poziom A

4 przedmiotów
Mo.co Explode-O-Matic Trigger
Explode-O-Matic Trigger
Rola · Proc · chain explosions

Dlaczego tutaj: Finishing blows can chain into area explosions, making it especially effective against dense groups.

Mo.co Unstable Beam
Unstable Beam
Rola · Proc · single target

Dlaczego tutaj: A chance to beam the first enemy hit on each attack gives focused damage against strong targets.

Mo.co Pocket Airbag
Pocket Airbag
Rola · Defense · shield

Dlaczego tutaj: Every 10 seconds it protects the next hit from damage, stun, and pushback, smoothing dangerous encounters.

Mo.co Healthy Snacks
Healthy Snacks
Rola · Defense · health

Dlaczego tutaj: A larger total health pool is a simple, consistent survivability boost across builds.

B

Poziom B

4 przedmiotów
Mo.co Smelly Socks
Smelly Socks
Rola · Area damage · close range

Dlaczego tutaj: Constant area damage is useful when enemies stay close, but it asks for a riskier position.

Mo.co Cactus Charm
Cactus Charm
Rola · Reactive · damage

Dlaczego tutaj: Returning damage whenever you are hit rewards brawling, but it needs incoming hits to matter.

Mo.co Auto Zapper
Auto Zapper
Rola · Lightning · single target

Dlaczego tutaj: Automatic lightning every three seconds adds repeatable damage and non-boss stuns, especially in single target fights.

Mo.co Healing Charm
Healing Charm
Rola · Healing · support

Dlaczego tutaj: The chance to amplify healing is useful for sustain builds, but less universal than direct damage or defense.

C

Poziom C

3 przedmiotów
Mo.co Gadget Battery
Gadget Battery
Rola · Proc · gadget synergy

Dlaczego tutaj: It zaps the closest enemy whenever a gadget is used, so its value depends on frequent gadget casts.

Mo.co Unstable Lightning
Unstable Lightning
Rola · Proc · gadget damage

Dlaczego tutaj: Gadget damage can trigger extra lightning, making it more attractive with several offensive gadgets.

Mo.co R&B Mixtape
R&B Mixtape
Rola · Healing · team

Dlaczego tutaj: Continuous area healing is a strong team tool, but its best use is coordinated group play.

D

Poziom D

1 przedmiotów
Mo.co Chicken-O-Matic
Chicken-O-Matic
Rola · Situational passive

Dlaczego tutaj: The current snapshot places it in D; keep it as an experiment when a specific build effect makes it worthwhile.

Poziomy są redakcyjną interpretacją aktualnych danych społeczności i poradników, a nie oficjalnym rankingiem Supercell. Sprawdź je ponownie po aktualizacjach balansu.

Zachowaj rzetelność snapshotu

Zmiany mety Mo.co (wrzesień 2026)

Ta strona zapisuje społecznościowy snapshot z września 2026. Konkretne twierdzenia o buffach lub nerfach dodajemy tylko wtedy, gdy potwierdza je publiczna notatka albo wiarygodne źródło ekwipunku.

Aktualny snapshot

Przegląd Noff z września 2026 umieszcza Jaded Blades, Speedshot i Spinsickle w S-tierze broni; Smart Fireworks i Multi Zapper prowadzą wśród gadżetów, a Vampire Teeth i Unstable Lazer wśród pasywek.

Co się zmieniło

Nie przypisujemy tutaj żadnego konkretnego oficjalnego buffa ani nerfa z września. Przed kolejną zmianą należy porównać publiczne notatki patcha z tier listami społeczności.

Jak używać

Traktuj S-tier jako mocny punkt wyjścia, nie obietnicę. Dopasuj wybór do trybu, drużyny i synergii opisanych na każdej karcie.

Buduj pod zawartość

Tier lista rozdziału 2 i najlepsze buildy

Ekwipunek rozdziału 2 jest użytecznym filtrem, ale najlepszy zestaw zależy od tego, czy rozwiązujesz problem bossa, grupy potworów czy wsparcia drużyny.

Ekwipunek rozdziału 2 do testów

Poison Bow · Hornbow · Singularity

Strony ekwipunku Noff wskazują je jako przedmioty rozdziału 2. Porównaj truciznę, wielokrotne strzały i skracanie odnowień gadżetów.

Boss i pojedynczy cel

Speedshot + Multi Zapper + Unstable Beam

Speedshot utrzymuje presję na jednym celu, Multi Zapper może skupić wyładowania, a Unstable Beam działa wokół pierwszego trafionego wroga.

Czyszczenie grup

Spinsickle + Smart Fireworks + Unstable Lazer

Spinsickle zapewnia obrażenia obszarowe z bliska, a Smart Fireworks i Unstable Lazer dodają presję dystansową lub procową.

Solo i podtrzymanie

Wolf Stick + Vitamin Shot + Vampire Teeth

Wilk może odciągać uwagę, Vitamin Shot daje szybkość ataku i leczenie, a Vampire Teeth nagradza ciągłe atakowanie.

Stwórz listę w czterech krokach

Jak stworzyć Mo.co Tier List

Użyj kreatora tier list Mo.co, aby zmienić snapshot mety we własny ranking broni, pasywek lub gadżetów.

01

Wybierz ekwipunek

Przeszukaj bibliotekę startową 47 przedmiotów albo prześlij obraz, jeśli brakuje broni, pasywki lub gadżetu Mo.co.

02

Umieść na poziomach

Przeciągnij każdy przedmiot do S, A, B, C lub D. Zmień nazwę i kolor wiersza, gdy używasz innej skali.

03

Dodaj własną regułę

Użyj tytułu takiego jak najlepsza broń na bossów, ekwipunek rozdziału 2 lub buildy solo, aby wyjaśnić kryterium rankingu.

04

Pobierz lub udostępnij

Zapisz planszę lokalnie, utwórz link udostępniania albo pobierz gotową Mo.co tier list jako PNG. Rejestracja nie jest potrzebna.

Częste pytania

FAQ Mo.co Tier List Maker

Jak zrobić tier listę mo.co?

Użyj kreatora powyżej. Przeciągaj broń, pasywki i gadżety do poziomów S–D, dostosuj etykiety i pobierz PNG. Rejestracja nie jest wymagana.

Jakie są teraz najlepsze bronie mo.co?

Wśród najlepszych broni snapshotu z września 2026 są Jaded Blades, Speedshot i Spinsickle. Pełna tier lista broni pokazuje wszystkie pozycje i powody.

Czy ta tier lista mo.co jest aktualna?

Tak. Snapshot redakcyjny pochodzi z września 2026 i należy go odświeżać po dużych publicznych aktualizacjach na podstawie aktualnych poradników i danych społeczności.

Czym jest tier lista rozdziału 2 mo.co?

Porównaj Poison Bow, Hornbow i Singularity w sekcji rozdziału 2, a następnie dopasuj ranking do własnego trybu i buildu.

Czy mogę użyć tego jako szablonu tier listy mo.co?

Tak. Zacznij od biblioteki ekwipunku, przenieś przedmioty do własnych poziomów, zmień nazwę listy i pobierz lub udostępnij szablon.

Sprawdź dowody

Źródła i zakres Mo.co Tier List

Poniższe mechaniki i grupowania opierają się na publicznych stronach ekwipunku i poradnikach dla graczy. To przydatne dowody, nie oficjalne poparcie.

Noff · aktualny przegląd tierów

Przegląd z września 2026 dostarcza grupowanie całego ekwipunku oraz osobne tiery broni, gadżetów i pasywek użyte jako początkowy snapshot.

Noff · mechaniki ekwipunku

Indywidualne strony Noff opisują ataki, efekty combo, odnowienia i zastosowania dostarczonych przedmiotów.

Rankingi społeczności mogą się różnić, ponieważ tryb, skład drużyny, postęp i styl gry zmieniają odpowiedź. Zaktualizuj stronę, gdy nowe notatki istotnie zmienią dowody.

Wybierz build

Stwórz Mo.co Tier List, której możesz bronić

Zacznij od bieżącego snapshotu, przesuń ekwipunek i wyeksportuj ranking pokazujący twoje spojrzenie na metę.

Edytuj poziom