製作你的怪物獵人排名。

Mo.co Tier List Maker

在可搜尋的面板中,為 47 個 Mo.co 武器、小工具與被動分級。以 2026 年 9 月編輯快照為起點,製作並匯出自己的 PNG。

免費無需註冊47 個裝備PNG 匯出
已儲存在此瀏覽器
03 儲存並分享
02拖曳進行排名即時編輯器
已排名 0 個裝備
把最好的放這裡
將圖片拖曳到這裡
將圖片拖曳到這裡
將圖片拖曳到這裡
將圖片拖曳到這裡
編輯版版本快照 · 2026 年 9 月

Mo.co Tier 表(2026 年 9 月)

以目前社群快照為起點,再透過上方編輯器做出自己的判斷。每張卡片都包含定位與簡短理由,讓排名不只是名稱列表。

2026 年 9 月快照
47裝備項目
3排名分類
S–D可編輯階級

Mo.co 武器 Tier 表

依據單人、組隊與 Boss 情境中的傷害表現、生存能力、控制與實用性為武器排名。

S

S 級

3 項
Mo.co Jaded Blades
Jaded Blades
定位 · Melee · single target

入選原因: High-speed stabs plus a charged dash that deals massive damage and stuns non-boss monsters.

Mo.co Speedshot
Speedshot
定位 · Ranged · single target

入選原因: Long-range boss pressure ramps after 10 attacks through SPEED mode.

Mo.co Spinsickle
Spinsickle
定位 · Melee · area damage

入選原因: SPIN mode adds faster attacks, enemy pass-through, area damage, and a chance to avoid hits.

A

A 級

3 項
Mo.co Wolf Stick
Wolf Stick
定位 · Ranged · pet

入選原因: The summoned wolf adds area damage, a taunt, and a body-slam stun while you attack from range.

Mo.co Techno Fists
Techno Fists
定位 · Ranged · bounce

入選原因: Bouncing energy balls give reliable cleave and stun value, with a stronger mega-ball combo.

Mo.co Buzzkill
Buzzkill
定位 · Melee · pet

入選原因: Front-facing area damage combines with up to three bees that add long-range pressure.

B

B 級

4 項
Mo.co Portable Portal
Portable Portal
定位 · Ranged · gadget synergy

入選原因: Its free rightmost-gadget activation can be strong, but the result depends on gadget cooldown and build.
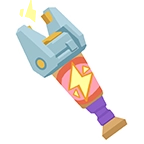
Mo.co Monster Slugger
Monster Slugger
定位 · Melee · area damage

入選原因: Reliable area swings and a slowing big hit are useful, but its single-target ceiling is more limited.

Mo.co Poison Bow
Poison Bow
定位 · Ranged · poison

入選原因: Poison volleys add damage over time and slow groups; spreading poison is more valuable than pure boss focus.

Mo.co Toothpick & Shield
Toothpick & Shield
定位 · Tank · damage reduction

入選原因: Twenty-five percent damage reduction and a retaliate slam make it dependable for defensive play, not raw damage.

C

C 級

3 項
Mo.co Singularity
Singularity
定位 · Melee · cooldown utility

入選原因: Area attacks and gadget cooldown reduction bring utility, but the kit is more tempo-dependent than top picks.

Mo.co CPU Bomb
CPU Bomb
定位 · Ranged · area damage

入選原因: Long-range area damage and a delayed stun bomb are useful, but the combo is slower to land.

Mo.co Hornbow
Hornbow
定位 · Ranged · multi-shot

入選原因: Three bolts and a piercing mega-shot reward tight positioning, which makes its output less forgiving.

D

D 級

2 項
Mo.co Staff of Good Vibes
Staff of Good Vibes
定位 · Support · healing

入選原因: It heals allies while damaging at range, but the dedicated support role is niche when teams prioritize damage.

Mo.co Medicine Ball
Medicine Ball
定位 · Support · healing

入選原因: Close-range area damage and every-third-attack healing are useful in a coordinated group, but situational overall.
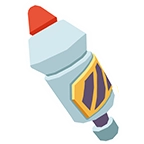

Mo.co 小工具 Tier 表

依據傷害、治療、控制、冷卻價值以及與不同武器的搭配難度為小工具排名。

S

S 級

2 項
Mo.co Smart Fireworks
Smart Fireworks
定位 · Ranged · area damage

入選原因: Five homing projectiles deliver reliable long-range area damage against groups.

Mo.co Multi Zapper
Multi Zapper
定位 · Lightning · stun

入選原因: Twelve zaps can focus a strong enemy and stun non-bosses, giving it broad encounter value.

A

A 級

5 項
Mo.co Explosive 6-Pack
Explosive 6-Pack
定位 · Mobility · area damage

入選原因: Jumping bombs add area damage while helping you clear low obstacles or avoid incoming hits.

Mo.co Snow Globe
Snow Globe
定位 · Area damage · zone

入選原因: Its sustained area zone is built for keeping damage on grouped enemies.

Mo.co Vitamin Shot
Vitamin Shot
定位 · Buff · healing

入選原因: Attack-speed and healing support both damage output and survivability for you and your pets.

Mo.co Boombox
Boombox
定位 · Area damage · stun

入選原因: A 360-degree wave damages and stuns non-bosses, covering weapons that lack crowd control.

Mo.co P.E.W 3000
P.E.W 3000
定位 · Turret · single target

入選原因: The long-range turret adds sustained single-target damage, although its cooldown is long.

B

B 級

5 項
Mo.co Monster Taser
Monster Taser
定位 · Stun · single target

入選原因: A short cooldown and strong single-target stun are valuable, but it has no area damage and is weaker against bosses.

Mo.co Pepper Spray
Pepper Spray
定位 · Cone · slow

入選原因: Repeated cone damage and a slow control groups at range, while its single-target value is limited.

Mo.co Spicy Dagger
Spicy Dagger
定位 · Dash · debuff

入選原因: The dash slows non-bosses and temporarily makes the target take more damage from the whole build.

Mo.co Really Cool Sticker
Really Cool Sticker
定位 · Buff · weapon and pets

入選原因: The short damage window is strong when a weapon or pet build can concentrate attacks.

Mo.co Very Mean Pendant
Very Mean Pendant
定位 · Area damage · sustain

入選原因: It deals damage over time and heals you, with its best value when one enemy takes the full damage.

C

C 級

4 項
Mo.co Revitalizing Mist
Revitalizing Mist
定位 · Healing · support

入選原因: Instantly healing the lowest-health nearby ally is useful sustain, but it contributes no direct damage.

Mo.co Life Jacket
Life Jacket
定位 · Shield · area damage

入選原因: The shield protects you and pets before exploding for area damage and a non-boss stun; timing matters.

Mo.co Feel-Better Bloom
Feel-Better Bloom
定位 · Healing · area

入選原因: A healing totem can sustain allies in its radius, but its longer cooldown limits repeated uptime.

Mo.co Shelldon
Shelldon
定位 · Summon · taunt

入選原因: The armored summon adds close-range area damage and aggro control, balanced by a long cooldown.

D

D 級

2 項
Mo.co Splash Heal
Splash Heal
定位 · Healing · team

入選原因: Pure healing has no monster damage, so its value is highly dependent on team play.

Mo.co Super Loud Whistle
Super Loud Whistle
定位 · Tank · aggro

入選原因: Aggro utility is a narrow fit for defensive tank builds and offers less value to general damage setups.

Mo.co 被動 Tier 表

依據穩定性、構築協同、生存能力與一般戰鬥中的額外價值為被動排名。

S

S 級

2 項
Mo.co Vampire Teeth
Vampire Teeth
定位 · Sustain · weapon and pets

入選原因: Weapon attacks heal you and pet attacks heal them, rewarding continuous pressure with reliable sustain.

Mo.co Unstable Lazer
Unstable Lazer
定位 · Proc · area damage

入選原因: Its weapon-or-pet damage proc scales naturally with area attacks and pet-heavy builds.

A

A 級

4 項
Mo.co Explode-O-Matic Trigger
Explode-O-Matic Trigger
定位 · Proc · chain explosions

入選原因: Finishing blows can chain into area explosions, making it especially effective against dense groups.

Mo.co Unstable Beam
Unstable Beam
定位 · Proc · single target

入選原因: A chance to beam the first enemy hit on each attack gives focused damage against strong targets.

Mo.co Pocket Airbag
Pocket Airbag
定位 · Defense · shield

入選原因: Every 10 seconds it protects the next hit from damage, stun, and pushback, smoothing dangerous encounters.

Mo.co Healthy Snacks
Healthy Snacks
定位 · Defense · health

入選原因: A larger total health pool is a simple, consistent survivability boost across builds.

B

B 級

4 項
Mo.co Smelly Socks
Smelly Socks
定位 · Area damage · close range

入選原因: Constant area damage is useful when enemies stay close, but it asks for a riskier position.

Mo.co Cactus Charm
Cactus Charm
定位 · Reactive · damage

入選原因: Returning damage whenever you are hit rewards brawling, but it needs incoming hits to matter.

Mo.co Auto Zapper
Auto Zapper
定位 · Lightning · single target

入選原因: Automatic lightning every three seconds adds repeatable damage and non-boss stuns, especially in single target fights.

Mo.co Healing Charm
Healing Charm
定位 · Healing · support

入選原因: The chance to amplify healing is useful for sustain builds, but less universal than direct damage or defense.

C

C 級

3 項
Mo.co Gadget Battery
Gadget Battery
定位 · Proc · gadget synergy

入選原因: It zaps the closest enemy whenever a gadget is used, so its value depends on frequent gadget casts.

Mo.co Unstable Lightning
Unstable Lightning
定位 · Proc · gadget damage

入選原因: Gadget damage can trigger extra lightning, making it more attractive with several offensive gadgets.

Mo.co R&B Mixtape
R&B Mixtape
定位 · Healing · team

入選原因: Continuous area healing is a strong team tool, but its best use is coordinated group play.

D

D 級

1 項
Mo.co Chicken-O-Matic
Chicken-O-Matic
定位 · Situational passive

入選原因: The current snapshot places it in D; keep it as an experiment when a specific build effect makes it worthwhile.

這些階級是對目前社群與攻略資料的編輯性解讀,不是 Supercell 官方排名。平衡更新後請重新確認。

維持快照準確

Mo.co Meta 變動(2026 年 9 月)

本頁記錄 2026 年 9 月社群快照。只有在公開更新說明或可靠裝備來源支持時,才會加入具體的增強或削弱結論。

目前快照

Noff 的 2026 年 9 月概覽將 Jaded Blades、Speedshot 與 Spinsickle 列入武器 S 級;Smart Fireworks 與 Multi Zapper 領先小工具,Vampire Teeth 與 Unstable Lazer 領先被動。

有哪些變化

本頁沒有宣稱 9 月存在任何具體官方增強或削弱。下次更新前,應先對照公開版本說明與社群 Tier 表。

如何使用

將 S 級視為強力起點,而不是結果保證。請結合模式、隊伍與每張卡片說明的構築協同來選擇。

圍繞內容構築

Chapter 2 Tier 表與推薦構築

Chapter 2 裝備是實用的篩選條件,但最佳配置仍取決於你要處理 Boss、怪物群或隊伍支援問題。

值得測試的 Chapter 2 裝備

Poison Bow · Hornbow · Singularity

Noff 裝備頁面將它們列為 Chapter 2 內容。透過上方卡片比較毒、連射與小工具冷卻效益。

Boss 與單體目標

Speedshot + Multi Zapper + Unstable Beam

Speedshot 持續壓制單個目標,Multi Zapper 可以集中電擊,Unstable Beam 則以首次命中的敵人為核心。

清理怪群

Spinsickle + Smart Fireworks + Unstable Lazer

Spinsickle 提供近距離範圍傷害,Smart Fireworks 與 Unstable Lazer 補充遠程或觸發型壓制。

單人續航

Wolf Stick + Vitamin Shot + Vampire Teeth

狼可以吸引敵人注意,Vitamin Shot 提供攻速與治療,Vampire Teeth 則獎勵持續攻擊。

四步製作清單

如何製作 Mo.co Tier 表

使用 Mo.co Tier 表製作器,將版本快照轉化為你自己的武器、被動或小工具排名。

01

選擇裝備

從 47 個初始裝備中搜尋;如果缺少 Mo.co 武器、被動或小工具圖片,也可以上傳素材。

02

放入階級

將每件裝備拖入 S、A、B、C 或 D。使用不同評分尺度時,可以重新命名列並修改顏色。

03

加入你的標準

使用「最佳 Boss 武器」、「Chapter 2 裝備」或「單人構築」等標題,讓其他人知道排名依據。

04

下載或分享

將面板儲存在本機、建立分享連結,或將完成的 Mo.co Tier 表下載為 PNG。無需註冊。

常見問題

Mo.co Tier List Maker 常見問題

如何製作 mo.co Tier 表?

使用上方製作器。將武器、被動與小工具拖入 S–D 階級,編輯標籤後下載 PNG,無需註冊。

目前 mo.co 最好的武器是什麼?

2026 年 9 月快照中的主要武器包括 Jaded Blades、Speedshot 與 Spinsickle。完整排名與理由請查看上方武器 Tier 表。

這份 mo.co Tier 表更新了嗎?

已更新。編輯快照為 2026 年 9 月版本;大型公開更新後,應結合最新攻略與社群資料重新檢查。

什麼是 mo.co Chapter 2 Tier 表?

透過 Chapter 2 部分比較 Poison Bow、Hornbow 與 Singularity,再根據自己的模式與構築調整排名。

可以把它當作 mo.co Tier 表範本嗎?

可以。從裝備庫開始,將項目移入自訂階級,重新命名清單,然後下載或分享完成的範本。

核對依據

Mo.co Tier 表來源與範圍

以下機制與分類來自公開裝備頁面和玩家攻略,是有用的參考依據,但不代表官方推薦或認可。

Noff · 目前 Tier 概覽

2026 年 9 月概覽提供全部裝備分組,以及武器、小工具、被動的獨立階級,作為初始快照。

Noff · 裝備機制

Noff 的單項裝備頁面記錄攻擊、連招效果、冷卻時間與提供裝備的使用情境。

由於模式、隊伍組成、進度與玩法會改變結果,社群排名可能存在差異。當新說明明顯改變依據時,請更新頁面。

選擇你的構築

製作一份有依據的 Mo.co Tier 表

從目前快照開始,移動裝備並匯出一份體現你個人版本理解的排名。

編輯階級