
A useful MO.CO tier list has to separate weapons, gadgets, and passives. A weapon that wins a boss fight is not directly comparable with a passive that saves a run, so the real decision is which item solves the problem your encounter is presenting.
Noff is the ranking reference for this page; it is not an official Supercell ranking. The letter is meaningful inside its category, and the item can still be correct for a specific encounter or build.
What this MO.CO tier list measures
This page renders the September 2026 Noff snapshot across the three gear categories that shape a build: weapons, gadgets, and passives. It uses separate S/A/B/C/D groups for each category, because a letter only makes sense when you compare items doing the same job.
The official MO.CO release notes are useful context, but they are not the ranking source. The August maintenance note describes quest and matchmaking improvements, enemy-level and boss-spawn adjustments, and localization fixes. It does not provide a September win-rate table or a complete balance ranking, so this guide does not invent one.
MO.CO weapons, gadgets, and passives
These cards preserve the full supplied Noff grouping: 15 weapons, 16 gadgets, and 16 passives. The same letter scale is used inside each category, not across all 47 items as if a passive and a weapon were interchangeable.
Weapons
S Tier
3 itemsTop placements in the September Noff snapshot for this gear category; they offer a clear answer to a common encounter problem.
- Jaded Blades
- Speedshot
- Spinsickle
A Tier
3 itemsStrong and flexible gear that usually needs less setup than the lower groups, while still having a more specific job than the S picks.
- Wolf Stick
- Techno Fists
- Buzzkill
B Tier
4 itemsUseful when the build or encounter matches the effect; compare the job you need rather than treating the letter as a universal verdict.
- Portable Portal
- Monster Slugger
- Poison Bow
- Toothpick & Shield
C Tier
3 itemsNarrower or more timing-dependent choices in this snapshot; they can still be correct for a defensive, healing, or control plan.
- Singularity
- CPU Bomb
- Hornbow
D Tier
2 itemsThe lowest group in the supplied reference; use these only when their specialized utility solves a problem your build actually has.
- Staff of Good Vibes
- Medicine Ball
Gadgets
S Tier
2 itemsTop placements in the September Noff snapshot for this gear category; they offer a clear answer to a common encounter problem.
- Smart Fireworks
- Multi Zapper
A Tier
5 itemsStrong and flexible gear that usually needs less setup than the lower groups, while still having a more specific job than the S picks.
- Explosive 6-Pack
- Snow Globe
- Vitamin Shot
- Boombox
- P.E.W 3000
B Tier
5 itemsUseful when the build or encounter matches the effect; compare the job you need rather than treating the letter as a universal verdict.
- Monster Taser
- Pepper Spray
- Spicy Dagger
- Really Cool Sticker
- Very Mean Pendant
C Tier
4 itemsNarrower or more timing-dependent choices in this snapshot; they can still be correct for a defensive, healing, or control plan.
- Revitalizing Mist
- Life Jacket
- Feel-Better Bloom
- Shelldon
D Tier
2 itemsThe lowest group in the supplied reference; use these only when their specialized utility solves a problem your build actually has.
- Splash Heal
- Super Loud Whistle
Passives
S Tier
2 itemsTop placements in the September Noff snapshot for this gear category; they offer a clear answer to a common encounter problem.
- Vampire Teeth
- Unstable Lazer
A Tier
4 itemsStrong and flexible gear that usually needs less setup than the lower groups, while still having a more specific job than the S picks.
- Explode-O-Matic Trigger
- Unstable Beam
- Pocket Airbag
- Healthy Snacks
B Tier
4 itemsUseful when the build or encounter matches the effect; compare the job you need rather than treating the letter as a universal verdict.
- Smelly Socks
- Cactus Charm
- Auto Zapper
- Healing Charm
C Tier
3 itemsNarrower or more timing-dependent choices in this snapshot; they can still be correct for a defensive, healing, or control plan.
- Gadget Battery
- Unstable Lightning
- R&B Mixtape
D Tier
1 itemThe lowest group in the supplied reference; use these only when their specialized utility solves a problem your build actually has.
- Chicken-O-Matic
Why the key placements are useful
Noff supplies the tier grouping; the useful part for a player is knowing what problem each item solves and what it gives up. These notes turn selected placements into build decisions without claiming an invented damage test.
Jaded Blades S tier · weapon
Best use: choose it for close-range single-target pressure. The fast stabs keep damage flowing, while the charged dash adds a large hit and a non-boss stun. Limitation: the melee commitment asks you to manage contact and positioning; it is not automatically the safest boss weapon.
Speedshot S tier · weapon
Best use: take it when a fight rewards distance and sustained boss focus. After 10 attacks, the SPEED mode gives the weapon a clear ramping payoff. Limitation: the value takes time to build, so short pack encounters may favor area coverage instead.
Spinsickle S tier · weapon
Best use: use it when enemies arrive in packs. SPIN mode adds faster attacks, pass-through, area damage, and a chance to avoid hits, so it can clear while staying mobile. Limitation: its close-range plan is less attractive when you cannot safely occupy the group.
Wolf Stick A tier · weapon
Best use: use the ranged pet pattern when you need damage plus space. The wolf adds area pressure, taunt, and a body-slam stun while you attack from range. Limitation: pet value is tied to keeping the summon useful and alive; it is not the same as a direct burst weapon.
Techno Fists A tier · weapon
Best use: pick it for reliable ranged cleave and stun. Bouncing energy balls help when targets are positioned together, and the mega-ball combo gives a stronger payoff. Limitation: scattered targets reduce the bounce value, so it is less attractive in a fight that denies multi-target angles.
Smart Fireworks S tier · gadget
Best use: cover groups from range with five homing projectiles. It is a low-friction area option when targets move or do not line up neatly. Limitation: against a single boss, a specialized focused tool may give more concentrated value.
Multi Zapper S tier · gadget
Best use: bring it when a tough target needs repeated lightning pressure and non-boss enemies can be stunned. Its 12 zaps give it both focus and control value. Limitation: the boss interaction and target count still matter, so do not assume every zap creates the same value.
Vitamin Shot A tier · gadget
Best use: support a weapon or pet build that wants both attack speed and healing. It improves the two things that make long fights fail—tempo and staying power. Limitation: a pure burst setup may prefer a damage or control gadget instead of spending a slot on sustain.
Boombox A tier · gadget
Best use: patch a build's crowd-control gap with a 360-degree wave that damages and stuns non-bosses. It is especially useful when enemies surround the player rather than approaching from one lane. Limitation: the non-boss stun makes it less of a direct boss solution.
Vampire Teeth S tier · passive
Best use: take it for continuous-pressure builds. Weapon attacks heal the player and pet attacks heal the pets, so the effect supports both direct and pet-heavy patterns. Limitation: a passive that needs attacks to trigger does less for a build that spends most of its time disengaging.
Unstable Lazer S tier · passive
Best use: pair it with area attacks or pets so the weapon-or-pet damage proc has more chances to matter. It scales with the way those builds already deal damage. Limitation: it is less compelling when the loadout has few attacks or no reliable multi-target contact.
Explode-O-Matic Trigger A tier · passive
Best use: choose it for dense groups where finishing one enemy can create a chain of area explosions. It turns clear speed into additional clear speed. Limitation: sparse rooms and long boss phases give it fewer finishing blows to convert.
Unstable Beam A tier · passive
Best use: use it when the first enemy hit is also the target you most need to remove. The chance to add a beam to each attack makes it a natural focused-damage option. Limitation: it is less valuable when the build's main job is wide-area control.
Pocket Airbag A tier · passive
Best use: smooth out dangerous encounters with protection every 10 seconds against the next hit, stun, or pushback. It is a defensive timing tool rather than a damage button. Limitation: it does nothing for damage output, so the slot needs to buy enough survival to matter.
Poison Bow B tier · weapon
Best use: spread poison volleys through groups and let damage over time keep working while you reposition. The slow helps control the pack. Limitation: its role is broader area pressure rather than the cleanest single-target boss answer, which explains its lower general placement.
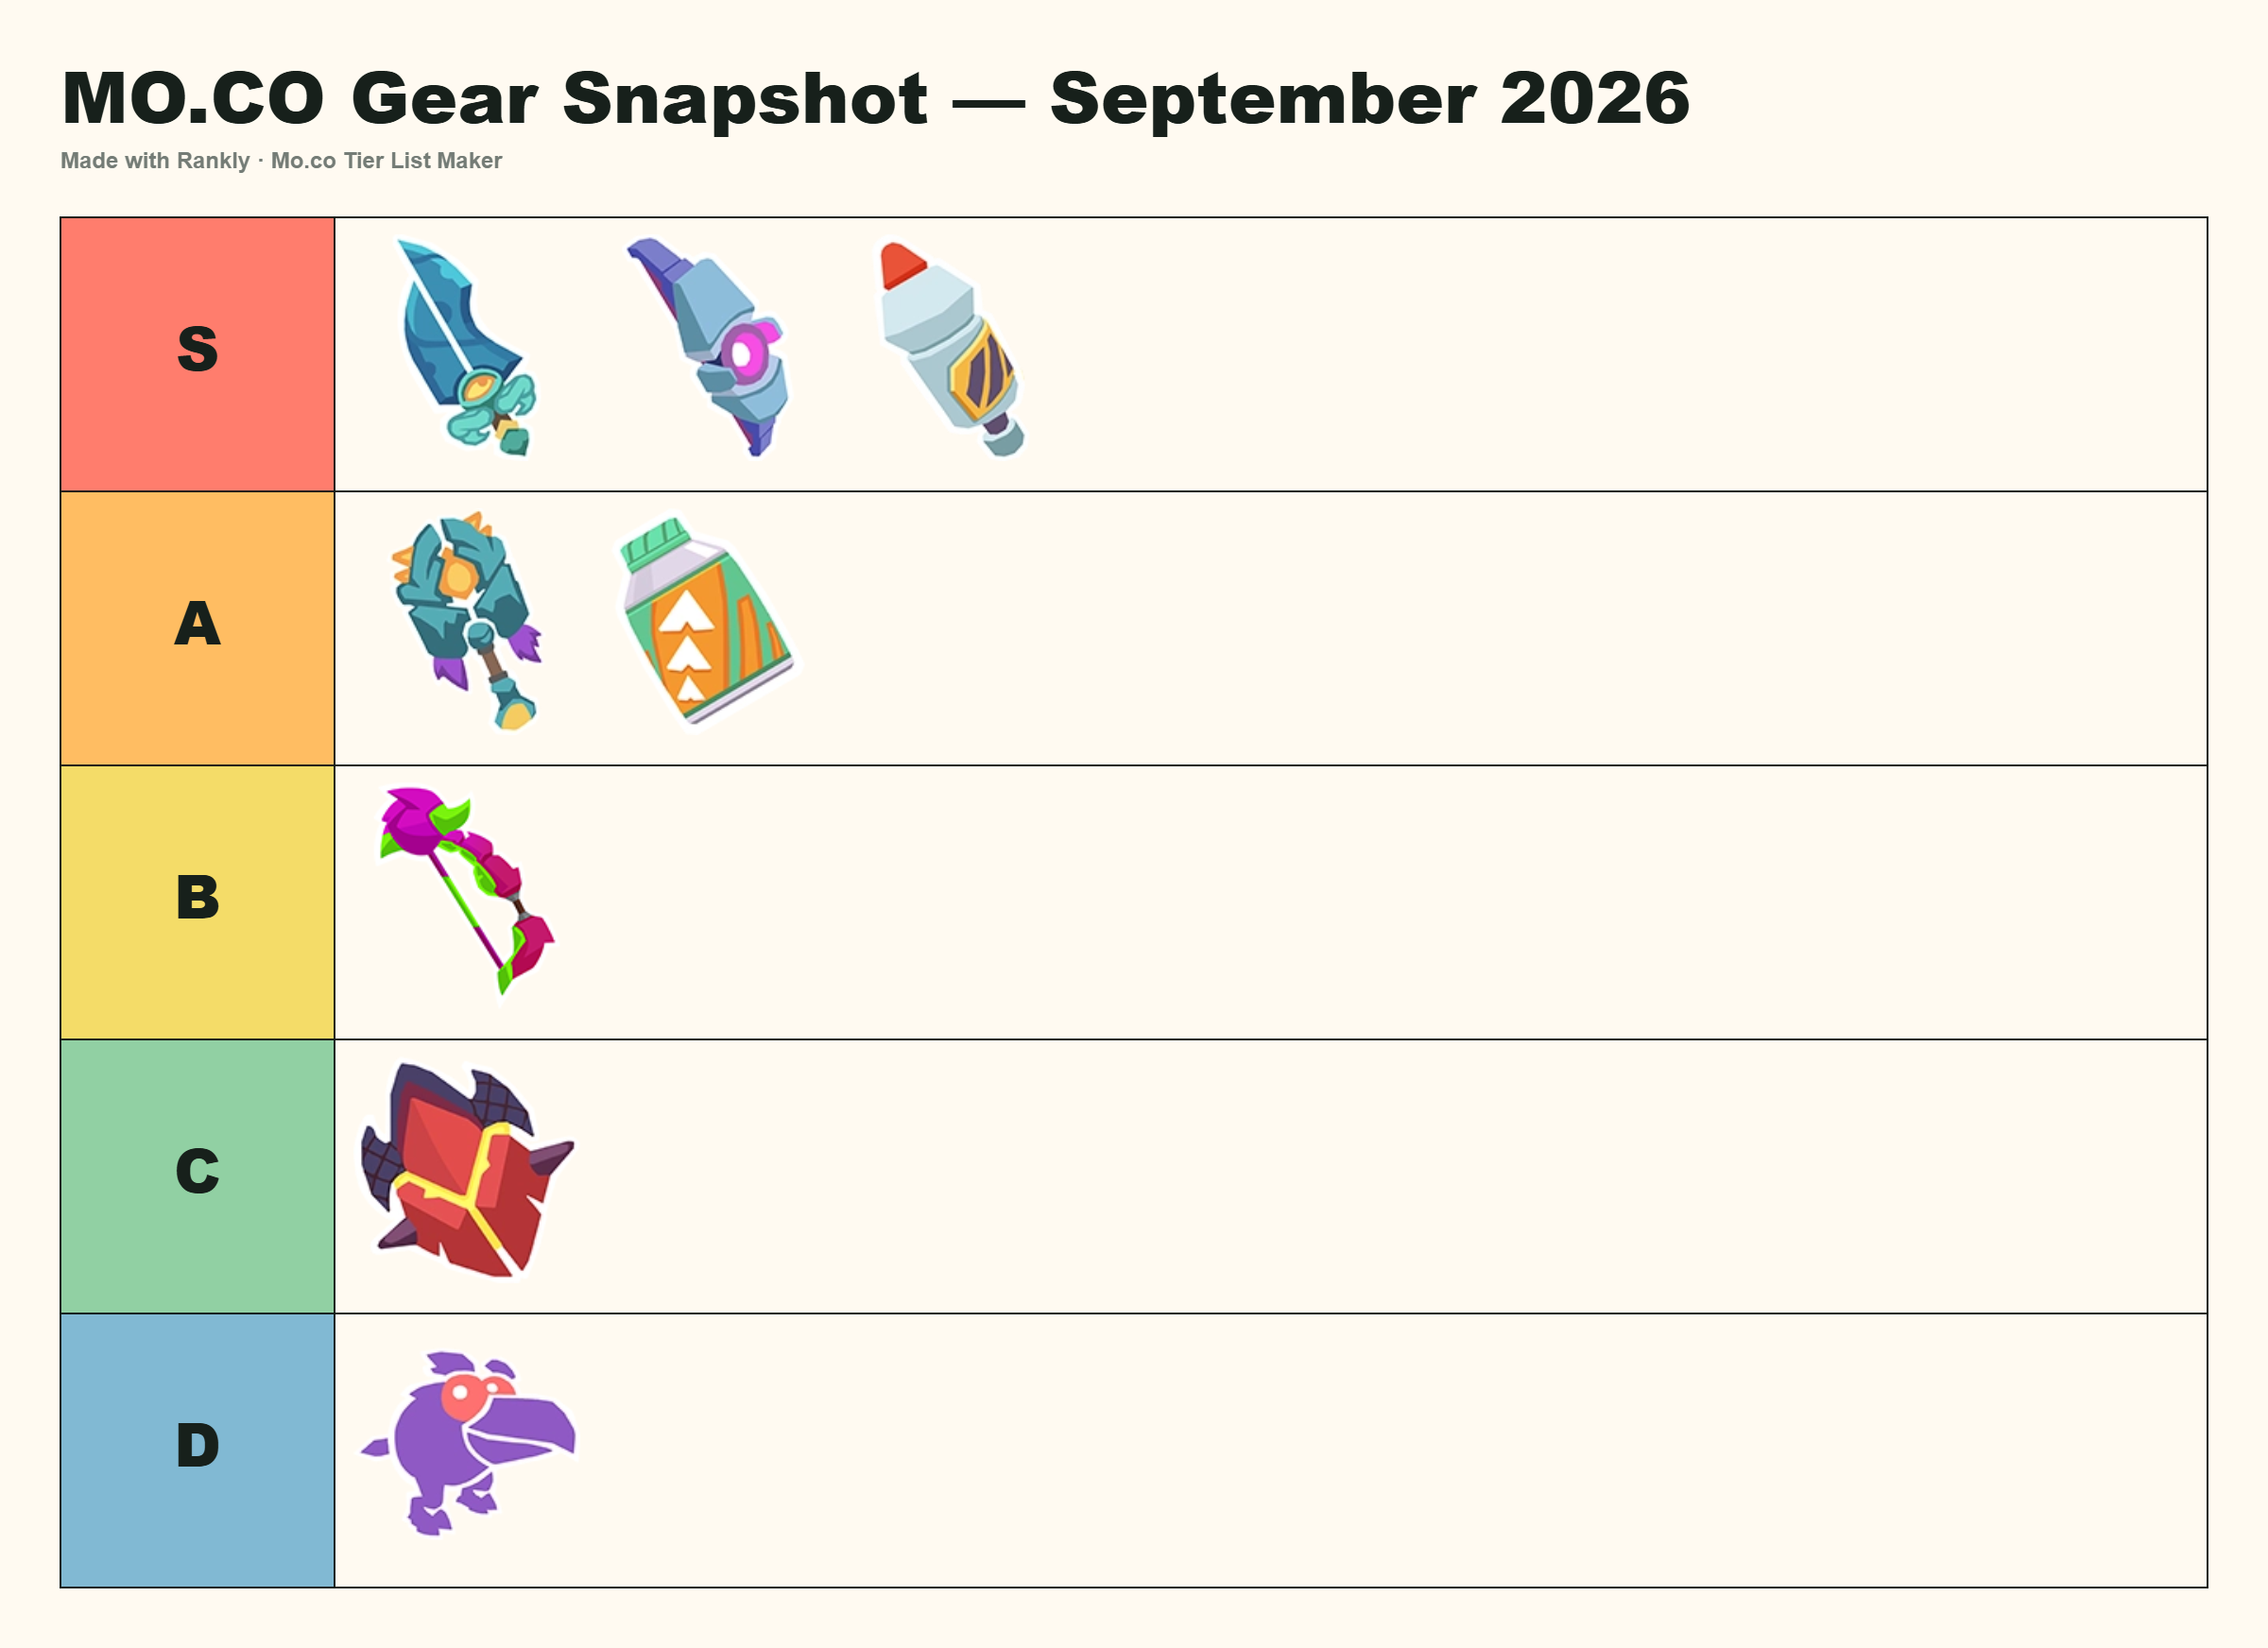
A real Rankly export example
This board was exported from the Rankly MO.CO editor using the supplied weapons, gadgets, and passive image library. It is a personal example: Jaded Blades, Speedshot, and Spinsickle show three different weapon jobs, while Smart Fireworks and Vampire Teeth show how a gadget and passive can be discussed without collapsing all gear into one list.
Four useful ways to read the list
Boss or single target: start with Speedshot when distance and sustained focus matter, then compare Multi Zapper for lightning pressure and Unstable Beam for a first-target damage proc. This is a coherent question, not a claim that those three are mandatory together.
Pack clear: Spinsickle, Smart Fireworks, and Unstable Lazer all point toward area pressure, but they do it from different slots. Spinsickle wants mobile melee positioning, Fireworks supplies homing range, and Lazer becomes more attractive when the build creates many weapon or pet damage events.
Solo sustain: Wolf Stick gives a ranged pet pattern with taunt and stun, Vitamin Shot combines attack speed with healing, and Vampire Teeth turns repeated attacks into sustain for player and pets. The trade-off is that this plan values uptime and safety over a single burst button.
Defensive or tank play: Toothpick & Shield and Pocket Airbag solve different defensive problems. The former supplies damage reduction and a retaliate slam; the latter protects the next hit, stun, or pushback on its timer. They are stronger when survival is the failure point, not when a build simply wants more damage.
What changed—and what the cited notes do not prove
Older MO.CO guides may use Chapter 2 or custom-loadout language. Supercell's “We are so back!” rework notes say custom loadouts were removed, weapons received fixed skills, gear progression moved to Upgrade Cores, and Chapters became Seasons. This article therefore describes current gear roles rather than presenting old Chapter 2 progression as the current system.
The official August maintenance note also does not establish a September balance tier movement. The Noff page is the dated ranking reference used for the cards above; when a verified balance note changes an item, update the affected category and the date rather than rewriting every item with generic “meta changed” copy.
Why your own MO.CO list may differ
MO.CO gear is a system of trade-offs. An item can be lower in a broad snapshot and still be your best answer when the encounter rewards healing, aggro, area control, or a pet loop. Give the list a specific question, then compare items inside the same category.
- Judge weapons by the target pattern: boss, pack, range, melee, pet, or control.
- Judge gadgets by the window they create: damage, stun, shield, healing, mobility, or debuff.
- Judge passives by the events that trigger them and the build that can sustain those events.
- Keep the date and source visible when a patch, season, or system rework changes the context.
How to make a MO.CO tier list with Rankly
Open the MO.CO tier list maker to arrange the supplied gear images into S, A, B, C, and D. Use one board for weapons, gadgets, or passives, or make three boards with the same encounter rule so the comparison stays honest.
- Title the board with the encounter and date.
- Place the obvious problem-solvers first: boss damage, pack clear, sustain, or control.
- Compare each item with another item in its own category before moving it across a tier.
- Export the PNG and explain the most surprising placement in the caption or post.
If the current editor's supplied starter set does not include a future item or a variant you want to judge, upload the image and label it clearly. That keeps the board useful without pretending the extra item was part of the dated Noff source.
Build your own MO.CO tier list
Start with the supplied MO.CO gear library, rank each category against a real encounter problem, and export a board you can explain.
MO.CO tier list maker →MO.CO tier list FAQ
What is the best weapon in MO.CO?
The September Noff snapshot places Jaded Blades, Speedshot, and Spinsickle in S for weapons. They answer different problems—melee single target, ranged boss pressure, and mobile area damage—so the best choice depends on the encounter.
What is the best gadget in MO.CO?
The snapshot places Smart Fireworks and Multi Zapper in S for gadgets. Smart Fireworks is the cleaner ranged area option, while Multi Zapper offers focused lightning and non-boss stun value.
What is the best passive in MO.CO?
Vampire Teeth and Unstable Lazer are the S-tier passives in the supplied snapshot. Vampire Teeth supports sustained healing for players and pets; Unstable Lazer is more attractive when the build creates many weapon or pet damage events.
Is this MO.CO tier list official and current?
No. It is a dated rendering of the September 2026 Noff reference. The official August maintenance notes describe quest, matchmaking, and quality-of-life work rather than a September balance ranking, so this page does not invent a patch movement that the cited notes do not establish.
How do I make my own MO.CO gear tier list?
Open MO.CO tier list maker, decide whether the board is for weapons, gadgets, or passives, then rank each category against one encounter problem at a time. Add the date and build rule before exporting so another player can tell why a defensive item is high on your list.
Ranking source: Noff MO.CO Tier List, September 2026. Official system context: August maintenance notes and “We are so back!” rework notes. Rankly is not affiliated with Supercell or Noff.